
Sending Newsletters via E-mails has become old. The future of the internet is more mobile than ever and only the quick adapters to more mobile-friendly ways of engaging visitors shall prevail and give online publishers a big boost ahead of their competition. In this article, I will show you how you can enable or setup browser push notifications on your Blogger website and turn your visitors into valuable customers!
Table of Contents
What Are Push Notifications?
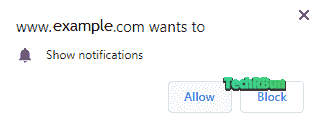
You might have noticed when you visit some website (for e.g. Facebook) on your browser, a popup request appears which demands your permission to display you the notifications from that website even when you are not actively using it.
When the user clicks on Allow, no matter whether it’s a computer or a mobile phone, he/she will be able to receive updates from the website about new posts, new videos or any other update that the website would like to send him/her.
Thus, the users keep coming back to the site and the website gains more authority in the user’s mind. This not only increases the direct traffic but also the social shares and helps to build a great trustable and reliable community who become your loyal visitors.
To understand better why Push Notifications are far better and more engaging than traditional e-mail newsletters, let’s understand their differences.
Also Check Out: How To Change Favicon In The New Blogger Interface
Why Are Push Notifications Better Than E-mail Newsletters?
I am not saying that E-mail Newsletters are not good. What I am saying is, they are used by everyone and now it has become an old technique, but surely is effective.
But there are plenty of advantages of Push Notifications over E-mail newsletters.
Easier To Sign Up
When a visitor comes to a new website, most of the time he/she won’t be comfortable putting his/her e-mail address to a random site. Looking from the visitor’s point of view, he/she will think that the site might leak their e-mail address to third parties for money or may use it to send spam.
Apart from that, signing up for E-mail Newsletters can be technically challenging for some people too, as it requires the user to confirm the sign up by clicking on the activation link that they receive via e-mail. Now, the activation mail most of the times end up in the spam box and thus are never found by the user, preventing him/her from subscribing to your website.
Even if the visitor signs up for your newsletter, you cannot be sure if the users will actually receive your e-mails or not. This is because, most popular email providers (like Gmail, Outlook, Yahoo, etc.) tend to filter Newsletters as SPAM and thus, the user doesn’t even notice your e-mails and end up completely forgetting about your website.
Check out: How To Prevent Your Newsletters From Going In Spam
But with Push Notifications…
The process is much much simpler. All the user needs to do is, click on the Allow button when the pop up appears and that’s it.
The user is instantly subscribed to your blog with one tap!
That’s the simplicity of Push Notifications!
Higher Click-Through Rates (CTR) And Better Visibility
Be honest. How many times do you open your E-mail inbox in a day?
An average user only checks his/her e-mail once a day or even less than that.
Now say how many times do you pull down the notification panel on your phone?
A lot of times, right?
So it must be now clear to you that your subscribers are much more likely to notice the Push Notifications compared to the E-mail Newsletters.
And with an attractive Title and Featured Image, you can easily get close to 100% CTR easily.
Now I will show you how to create Push Notifications in Blogger for free, to notify your subscribers every time you upload a new post or want to send any update / send a featured article notification to your users anytime you want.
Also Check Out: How To Make Setup Cloudflare For Blogger
How To Setup Free Push Notification Service In Blogger?
There are a lot of services out there online which provide Push Notification Service for Blogger. But not all of them are equally reliable or good.
After a lot of research, I have found that OneSignal is the best free Push Notifications Service for Blogger.
Thus I have provided a detailed guide on how to create web push notifications in Blogger using it.
Sign Up On OneSignal
Go to https://onesignal.com/webpush and sign up using the “Get Your Free Account” button.
Type your E-mail Address, Password and the name of your Website.
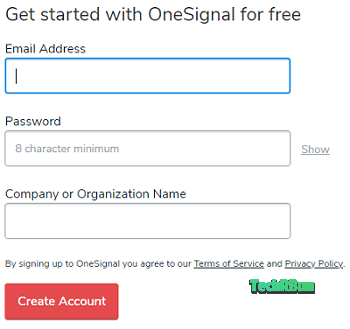
Alternatively, you can also use the social sign-in options which support sign in via Google, GitHub and Facebook.
If you signed up using your e-mail id, you will receive an e-mail from OneSignal (check your Spam box if not found in primary inbox) and you need to click on the “Click Here To Confirm Your Account” button in the e-mail.
Add Your Website
Now you will be logged in to your OneSignal account.
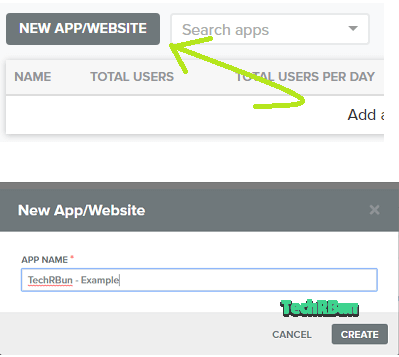
After closing the welcome message, click on the “NEW APP/WEBSITE” button.
Enter your Website’s name and click on “CREATE”.
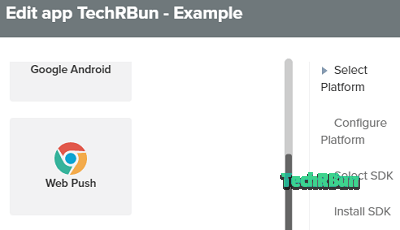
Select Platform
You will now be asked to select the platform.
Scroll down (if required) and select “Web Push”.
Click on “Next”.
Configure The Push Notification Service
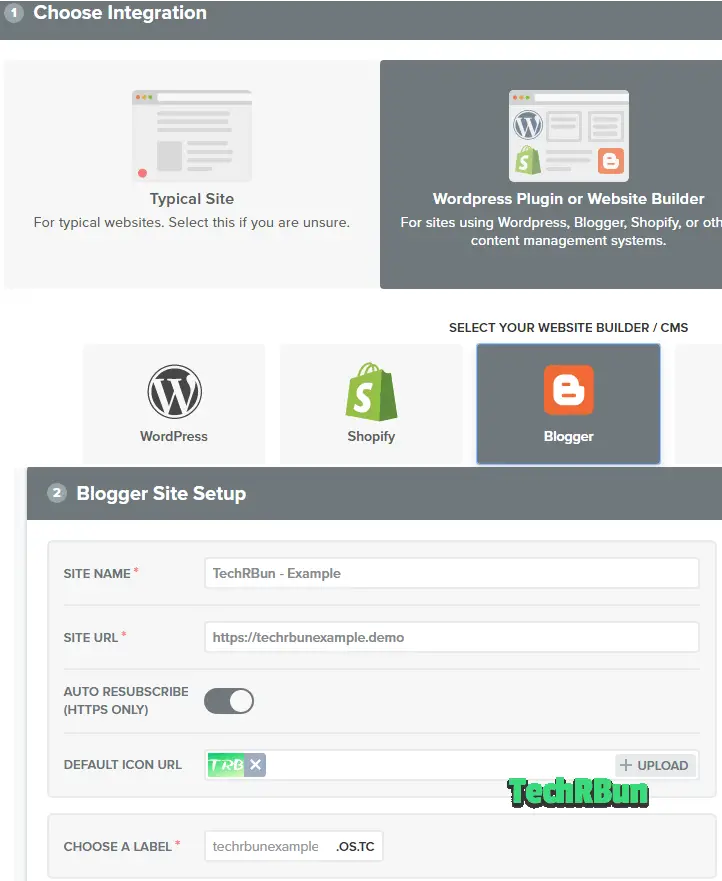
In step 1, select “WordPress Plugin Or Website Builder” as your integration.
In step 2, select “Blogger” as your CMS.
Fill out the Blogger Site Setup Form with your site’s name, URL and Icon (logo).
In the Choose A Label field, type your website’s name.
The Auto Resubscribe should be ON only if https is turned ON in your Blogger settings.
Set up Permission Prompt
Scroll down to Step 3, where you can customize how the prompt would like while asking your visitors to allow the notifications.
Click On “ADD A PROMPT”.
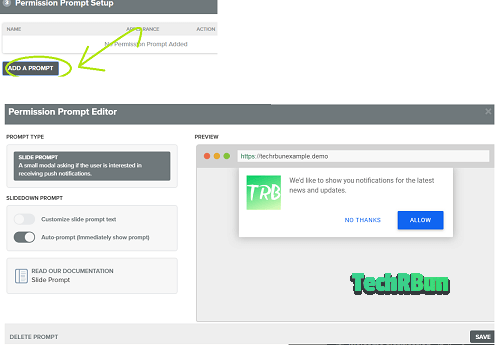
In the PROMPT TYPE, select SLIDE PROMPT.
The default settings are good enough.
But if you still want to edit the texts of the slider prompt shown at the right-hand side, enable the “Customize Slide Prompt Text” option and then you will be able to change the texts into more creative ones.
Then click on Save.
Make A Notification Bell Icon (OPTIONAL)
If you want, you can also make a bell notification icon which will stay at the corner of the screen when a visitor visits your site and will let him/her subscribe to your blog’s push notification by clicking on it.
To make a bell icon, click on “ADD A PROMPT” again.
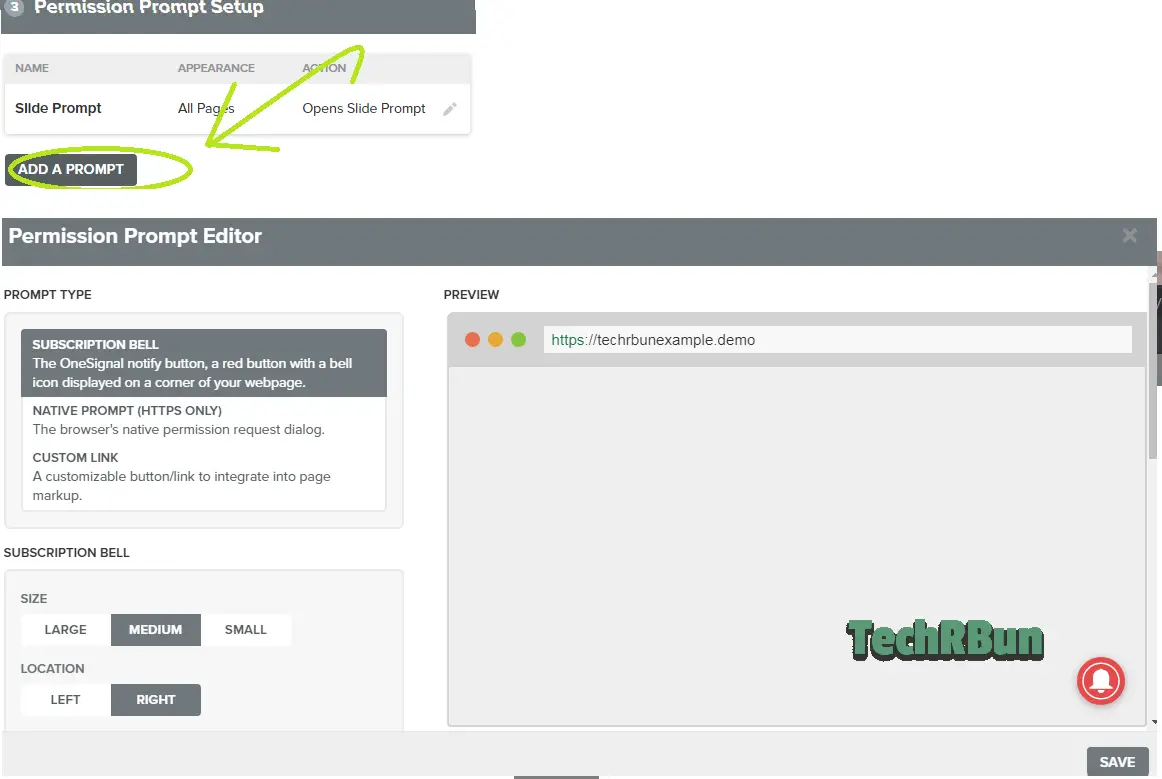
This time, the “SUBSCRIPTION BELL” option will be selected by default.
You can change the colour, size and position of the bell by scrolling down.
Then click on “SAVE”
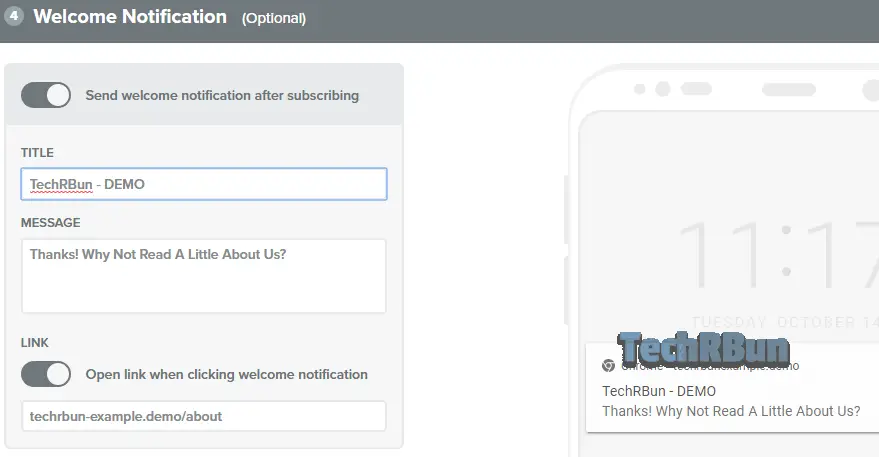
Customize Welcome Notification (OPTIONAL)
In step four, you can customize the notification that a user will receive instantly after subscribing to your blog.
You may also turn off the welcome notification.
SAVE THE CHANGES AND COPY THE CODE
You need not configure any settings other than those shown above.
Now click on “SAVE” at the end of the page.
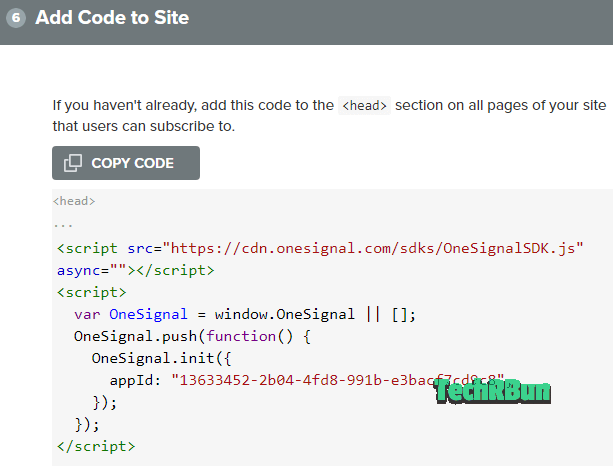
Click on “COPY CODE”.
Add The Code To Blogger
Go To BLOGGER –> THEME–> EDIT HTML (Using the 3-dot menu in the latest UI.)
In the edit HTML section, press CTRL+F and search for </head>
Just above </head>, paste the code that you just copied from OneSignal.
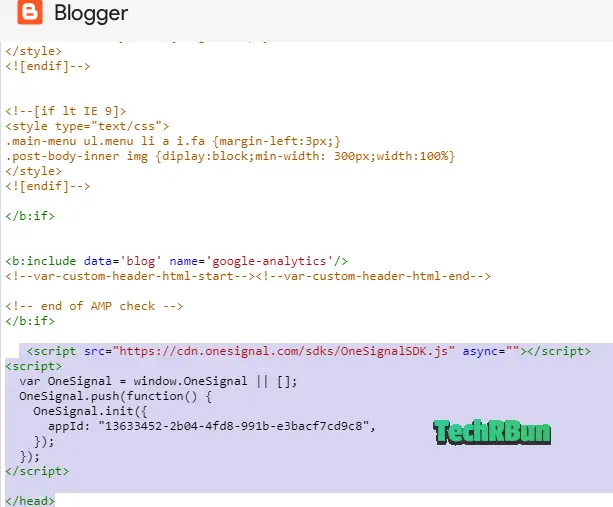
Now click on the save icon. (Located at the bottom right corner).
Then, come back to OneSignal and click on “FINISH”.
Congratulations!
You’ve successfully created Push Notification Service for your Blogger blog.
Also Check Out: How To Make Your Blogger Blog Full Width
How To Send Notifications To Your Subscribers?
Go to app.onesignal.com and select your website.
Then from the header menu, select “MESSAGES”.
After the page opens, click on “NEW PUSH”.
Fill up the Title, Message and Launch URL (the URL which will open when the user clicks on the notification).
Then click on CONFIRM.
The notification will be delivered to all the users that have subscribed to your Push Notifications.
I hope this article has helped you set up free push notifications for your Blogger blog.
I would really appreciate it if you share this article with your friends who might find it interesting.
Subscribe to the push notifications of TechRBun to keep receiving amazing tips related to Blogging.
Best of luck with growing your audience!
Have a nice day!
Thank you. This article is really helpful. I have setup the push notification on my blogspot blog. Very helpful resources on your blog. Will bookmark it.
I’m so glad?
Ei khusi te ekta Bhai party de?btw your site is lit .
Thanks??
BTW, kisher khushi???
Great article! You have shared an effective technique for new bloggers to share your content apart from newsletter email. It’s a great way to spread awareness of your website and to get traffic to your site as well.
Regards,
Hi Faizan,
I’m glad you liked the article! 🙂
My push notifications is not working , after completing all your steps??
Hi Satyam,
Please share your site’s URL so that I can check what’s wrong.
My push notifications are not working help please
url : https://thegujaratis.blogspot.com/
Hi, I’ve checked your blog and found that push notifications are working perfectly fine. Here are the screenshots:
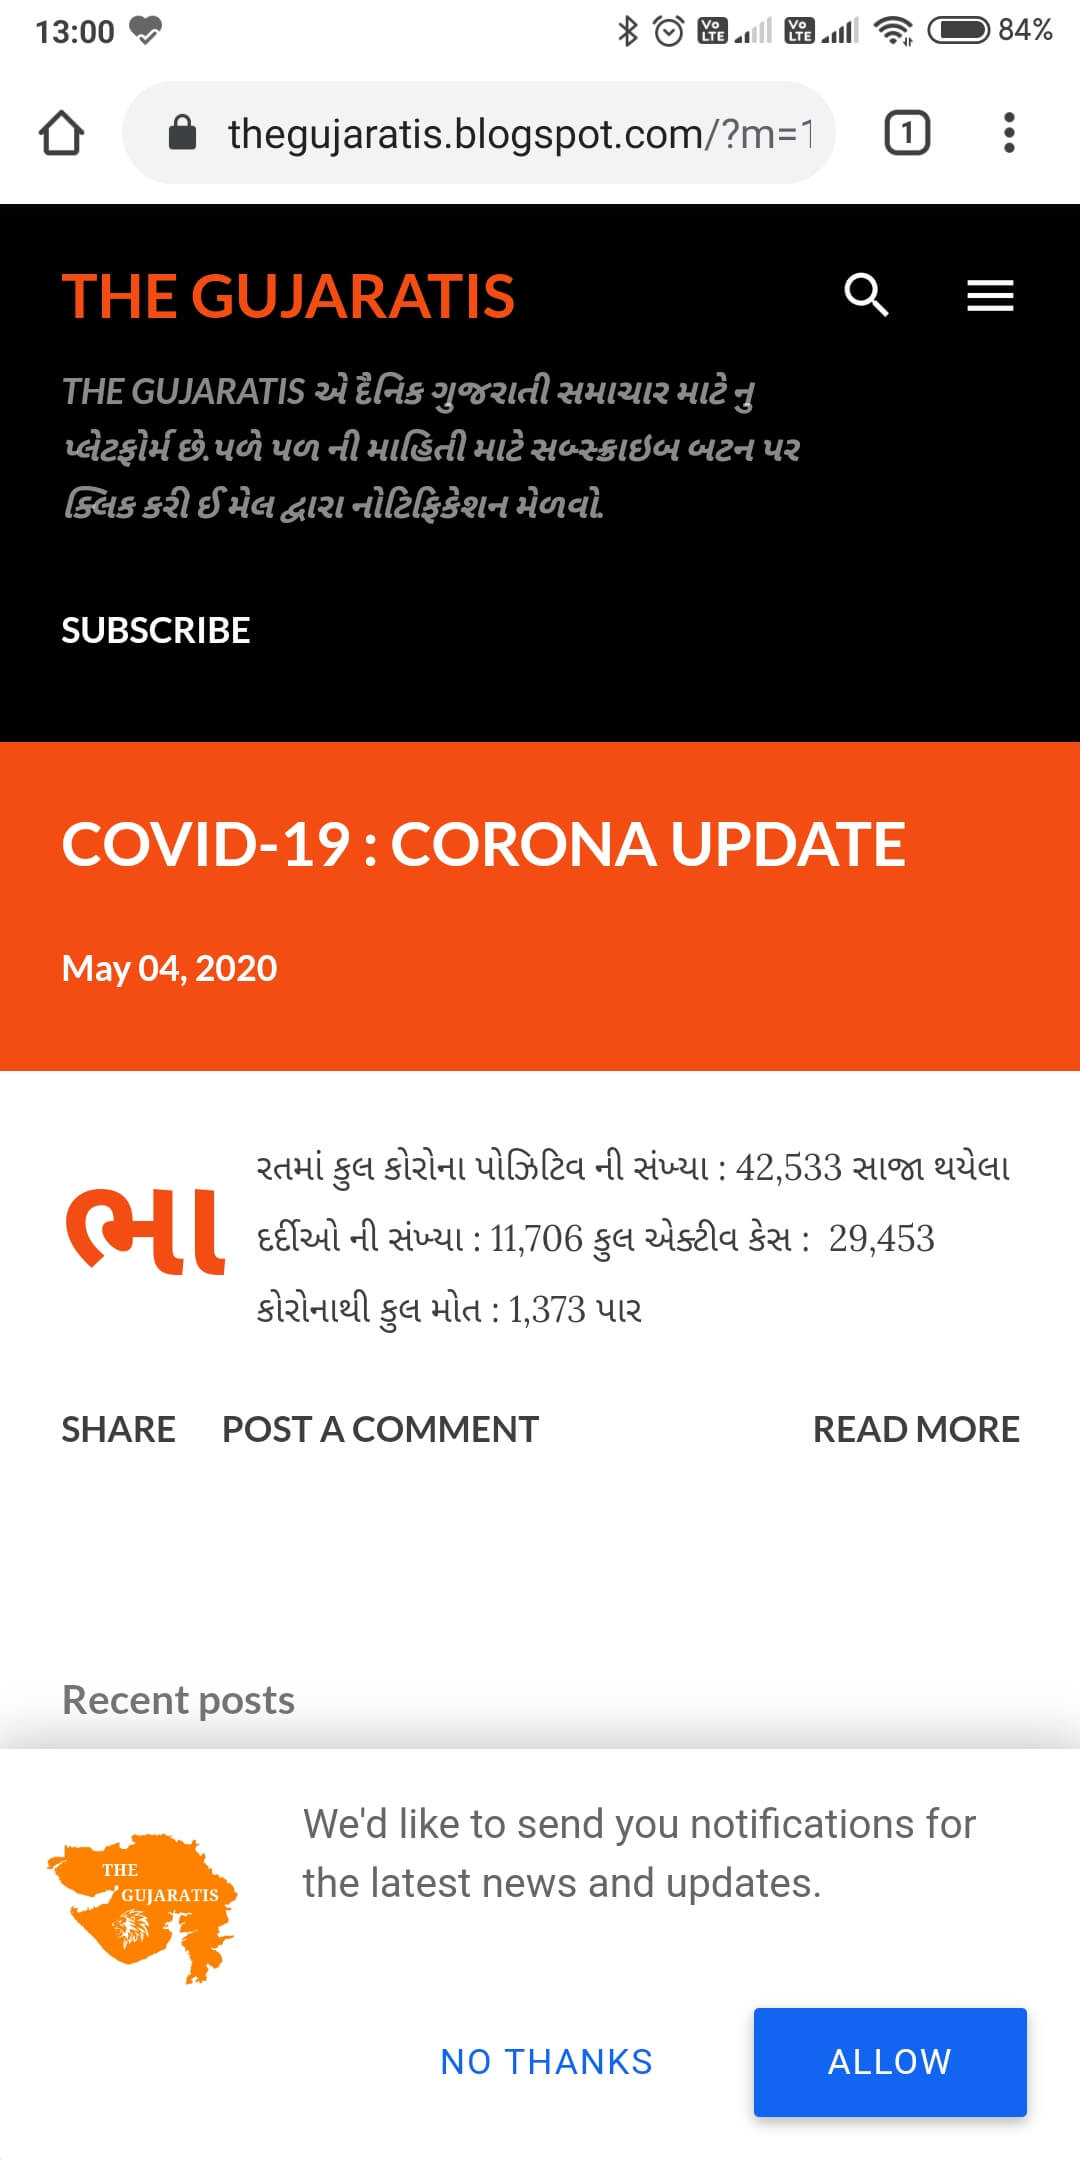
But when i send notification to my subscribers it isn’t showing them 🙁
You’re using the onesignal control panel to send the notifications, right? How are you checking the notifications? Have you set up the test devices properly? Also, do make sure that from your phone settings, chrome notifications are enabled.
If you still face problem, please understand that this article only teaches you how to integrate blogger with onesignal. However, there might be problems from onesignal’s side sometimes which may cause the error.
Thus, i would recommend you to contact the onesignal customer care if the problem still persists even after following the steps I mentioned above. I have talked to their customer care a few times, they’re quite responsive and I believe, they will solve your problem.
WHAT ABOUT TRUEPUSH. I AM USING THAT FOR MY SITE
I haven’t used that.
In my blog tag is not present.
Now what should I do?
Which tag are you talking about? The head tag? Well.. all HTML documents contain the head tag.
I put my OneSignal code on top of , just like you taught and showed in the image, however it doesn’t work. I have had this problem for two weeks.
I tried to put my OneSignal code under , just like the OneSignal tutorial teaches and it didn’t work either. Everything is set up correctly, however my webpush never appears …
This is my website: www.goldenvagas.com
Hi Ruyh, I’ve checked your site and saw that the push notifications are working perfectly fine. Check the screenshot:
Thanks for this great article
Hello Anirban!
I have tried to implement this into my website and it doesn’t seem to work. I have followed all the steps in the article and the prompt doesn’t appear on desktop using the Chrome browser. I’ve tried incognito mode and it still doesn’t work.
The prompt works just fine on mobile Chrome browser.
I’ve tried to fix it several times with no successes. Any ideas?
Hi Kevin, please ensure that you don’t have pop-up blockers enabled in your desktop browser. You may also comment your site’s URL here. I will check it out.
Hello Anirban thanks for the reply. It was working all along. Duck Duck Go was blocking it just as you mentioned above. Thank you! I have switched all of my subscribers to One Signal. Works great. I just wish there was a way to auto send, but thats ok.
Thank you sir!
On WordPress, the onesignal plugin provides you the option to auto send the notifications when a post is published!
Very good article. i also set push notification after read this article
how to bring organic traffic free in my blog?
Using SEO. 🙂 Check out this article: Get Your Articles Indexed On Google Instantly (2021) [2 Minutes]
and assuming that you’re a newbie blogger, don’t miss this one either: 8 Dangerous Blogging Mistakes That Beginners Must Avoid [Motivation]
Hello Anirban sir
This is very trustable article because you are telling us
But I m already using webpusr.com for web push notifications because they gives us 60k subscriber free for lifetime
But one signal allows only 10k subscriber for free
I want to know that is webpusr work ? As well as one signal
Which one you recommend in both
Should I had Need to change from webpusr.com to One signal.com
Thankyou 😊
I haven’t used webpusr. I will check it out when I get a chance.
This article was very helpful. I have successfully setup push notification on my blog.
Great! 🙂
Nice… Really helpful
You can check mine at https://reladex.blogspot.com whether I placed it well
I checked it, and it seems to work well.
But your page load speed to too slow, which you should definitely work on to improve. Try reducing the number of scripts you’re using.
thank you very much for enabling the push notification in my my blog …
Please my website is down after adding it to cloud flare, funlisthub.com. Please help me
Hi! As the process includes updating your nameservers, you need to wait 6-12 hours for the DNS propagation to complete globally. In the mean time, you can keep checking your site from other internet service providers (different mobile networks, broadbands, wifi networks) or use a VPN, to track the progress.