In this comprehensive guide, we will walk you through the step-by-step process of replacing the battery in iRobot Roomba, covering all models. Whether you own the latest Roomba model or an older version, this article will provide you with the necessary information and instructions to successfully replace the battery on your own.
The iRobot Roomba is a revolutionary autonomous vacuum cleaner that has transformed the way we clean our homes. With its advanced sensors and intelligent navigation system, the Roomba is designed to effortlessly navigate through rooms, efficiently sucking up dirt, dust, and debris from carpets and hard floors. Its compact size and sleek design make it a popular choice for homeowners and busy individuals alike, as it can easily maneuver under furniture and reach those hard-to-clean areas.
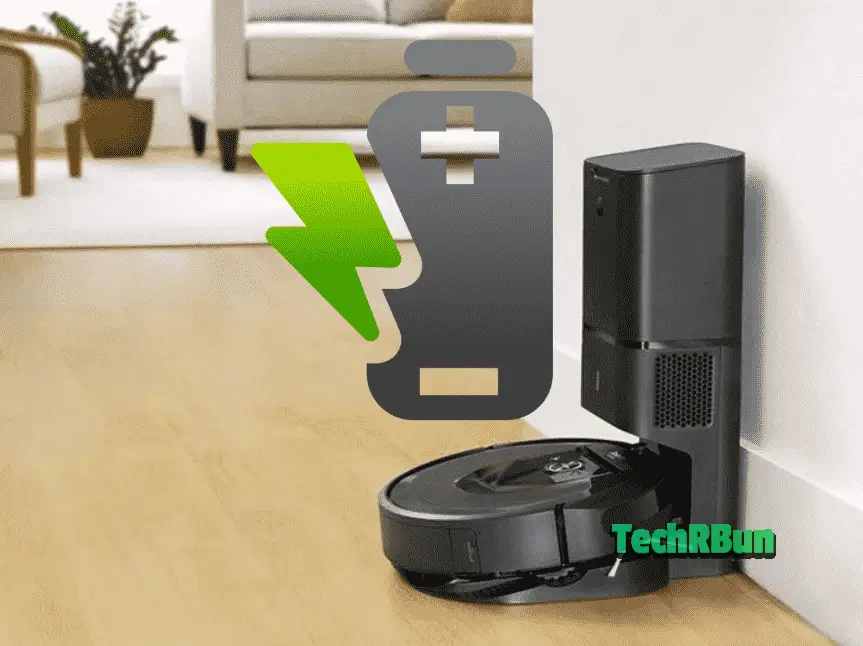
One crucial component that ensures the seamless operation of the iRobot Roomba is its battery. The battery powers the device, providing the necessary energy to keep it running smoothly. A fully functional and reliable battery is essential for the Roomba to perform at its best, allowing it to complete its cleaning cycles without interruption.
Over time, like any rechargeable battery, the Roomba’s battery will experience natural wear and tear, resulting in a decrease in its overall performance and runtime.
Hence, it becomes necessary to replace the battery to restore the Roomba’s efficiency and effectiveness.
From gathering the required tools to safely accessing the battery compartment and installing a new battery, we’ve got you covered. By the end of this article, you’ll be equipped with the knowledge and confidence to give your Roomba a new lease on life by replacing its battery. Let’s get started!
Table of Contents
- 1 Understanding iRobot Roomba Batteries
- 2 Preparing for Battery Replacement of Roomba
- 3 Step-by-Step Roomba Battery Replacement Process
- 4 Extending the Battery Life of Your Roomba
- 5 Recycling and Disposing of Old Batteries
- 6 Frequently Asked Questions
- 6.1 Addressing common queries related to Roomba battery replacement
- 6.2 How often should I replace the battery in my Roomba?
- 6.3 Can I use a third-party battery replacement for my Roomba?
- 6.4 Will replacing the battery void my Roomba’s warranty?
- 6.5 My Roomba doesn’t hold a charge for long. What should I do?
- 6.6 The Roomba battery drains quickly even after replacement. Why?
- 6.7 Can I overcharge my Roomba battery?
- 7 Troubleshooting tips and additional resources
- 8 Conclusion
Understanding iRobot Roomba Batteries
Types of batteries used in iRobot Roomba models
When it comes to iRobot Roomba models, they typically use two types of batteries: nickel-metal hydride (NiMH) and lithium-ion (Li-ion) batteries. NiMH batteries are commonly found in older Roomba models, while Li-ion batteries are used in the newer generations.
Both types have their advantages and considerations when it comes to replacing them.
NiMH batteries are known for their affordability and availability. They provide a decent runtime and are generally reliable. However, they may have a slightly shorter lifespan compared to Li-ion batteries.
On the other hand, Li-ion batteries offer a longer runtime, faster charging, and tend to have a longer overall lifespan. They are lightweight and have a higher energy density, making them an attractive choice for Roomba owners.
Battery specifications and considerations for compatibility
Roomba Replacement Battery Finder Tool
When replacing the battery in your iRobot Roomba, it’s crucial to consider certain specifications and compatibility factors to ensure a seamless fit. The most important specification is the voltage, which should match the original battery’s voltage.
Roomba models typically use either a 14.4V or 18V battery, so it’s essential to double-check the voltage requirement before purchasing a replacement battery.
Another consideration is the battery’s capacity, which is measured in milliampere-hours (mAh).
Higher capacity batteries generally provide longer runtime, allowing your Roomba to clean for a more extended period before requiring a recharge. However, it’s important to note that higher capacity batteries may have physical dimensions that differ from the original battery, so it’s crucial to ensure compatibility in terms of size and shape.
Average battery lifespan and signs of a failing battery
The lifespan of an iRobot Roomba battery can vary depending on several factors, including usage patterns, charging habits, and the specific battery model. On average, a Roomba battery can last anywhere from 1 to 2 years before its performance starts to decline.
As your Roomba battery approaches the end of its lifespan, you may notice some warning signs indicating it’s time for a replacement. The most common sign is a noticeable decrease in runtime. If your Roomba’s cleaning cycles are noticeably shorter, and it requires more frequent recharging, it’s a clear indication that the battery is nearing the end of its life.
Additionally, a failing battery may cause the Roomba to struggle with navigation or exhibit erratic behavior during cleaning. It may have difficulty reaching its docking station or fail to hold a charge even after a full night of charging. These issues indicate that the battery is no longer delivering the necessary power for optimal Roomba performance.
Understanding the different battery types, considering compatibility factors, and recognizing the signs of a failing battery are essential steps in preparing to replace the battery of your iRobot Roomba.
In the next section, we will guide you through the process of gathering the necessary tools for a successful battery replacement.
Preparing for Battery Replacement of Roomba
Gathering the necessary tools and equipment
Before diving into the battery replacement process, it’s important to gather the essential tools and equipment to ensure a smooth and successful procedure.
Here are the tools you’ll need:
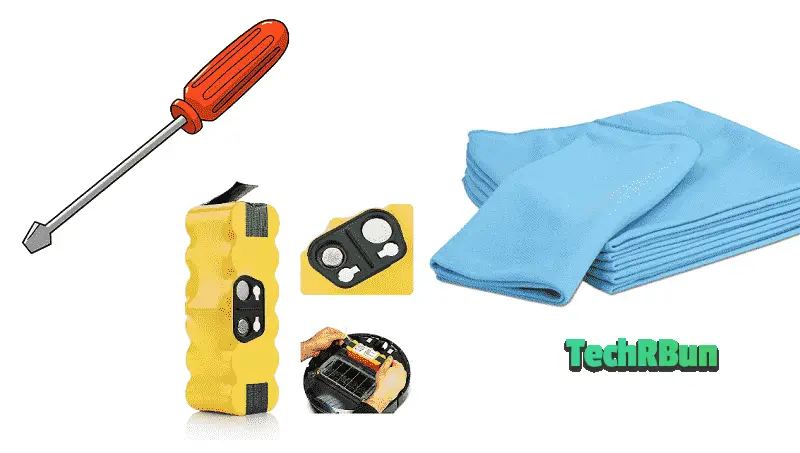
- Screwdriver: Depending on the Roomba model, you may require a Phillips or flathead screwdriver to remove the screws securing the battery compartment.
You can get the required screwdriver from Amazon. - Replacement battery: Ensure you have the correct replacement battery that matches your Roomba model’s specifications in terms of voltage, capacity, and physical dimensions. It’s advisable to purchase a high-quality battery from a reputable source to ensure optimal performance.
Use the Roomba Battery Finder tool to find the best replacement battery for your exact Roomba model. - Clean cloth or microfiber cloth: This will come in handy for wiping any dust or debris from the battery compartment and surrounding areas.
Identifying the correct replacement battery for your Roomba model
When it comes to finding the right replacement battery for your Roomba model, it’s important to ensure compatibility and reliability. As someone who has personally dealt with this issue, I can guide you through the process.
To find the correct replacement battery for your Roomba, perform the following steps:
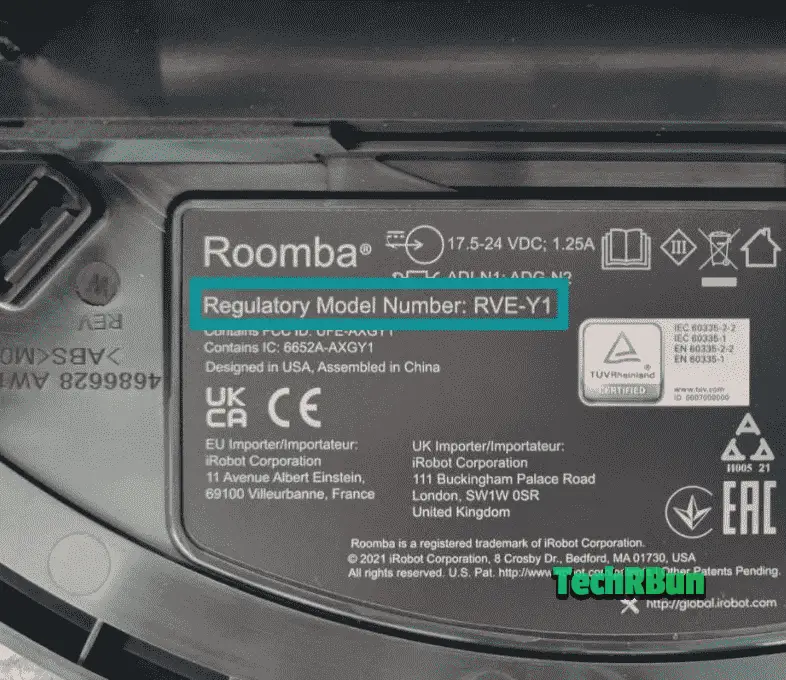
- Locate your Roomba model number. It is usually found on the underside of the device or in the user manual.
- Enter the model number into the Roomba Battery Finder tool given below.
- Click on the “Find Batteries” button.
Roomba Replacement Battery Finder Tool
Using this tool will save you time and effort, as you won’t have to manually search through various battery options. It ensures that you get accurate and reliable results tailored to your specific Roomba model.
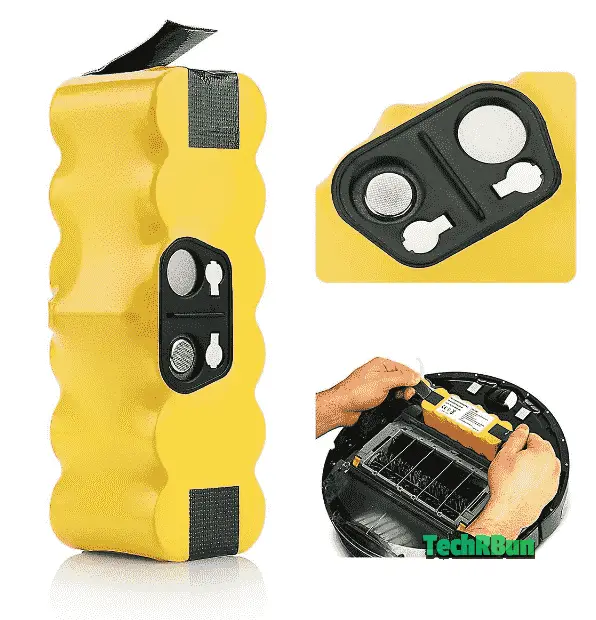
However, the battery pack that I personally use on my Roomba, is the Powerextra 4.0Ah 14.4V Replacement Battery. It’s compatible with almost all the iRobot Roomba models available out there in the market.
Safety precautions and recommendations
Safety should always be a priority when handling batteries. Here are some important precautions and recommendations to keep in mind:
- Disconnect the power: Before starting the battery replacement process, ensure your Roomba is turned off and disconnected from the charging dock. This will prevent any accidental power supply during the procedure.
- Allow the Roomba to cool down: If your Roomba has recently been in use, give it some time to cool down before proceeding with the battery replacement. This reduces the risk of accidental burns or damage to the device.
- Work in a well-lit area: Find a well-lit and spacious area to perform the battery replacement. Ample lighting will help you see the components clearly, reducing the chances of mistakes or mishandling.
- Handle the battery with care: When handling the old or new battery, be mindful of its delicate nature. Avoid dropping it or exposing it to excessive heat or moisture. Additionally, follow any specific handling instructions provided by the battery manufacturer.
By gathering the necessary tools, identifying the correct replacement battery, and adhering to safety precautions, you’ll be well-prepared for the battery replacement process.
In the next section, we’ll guide you through the step-by-step procedure of accessing and replacing the battery in your iRobot Roomba.
Step-by-Step Roomba Battery Replacement Process
Powering off and preparing the Roomba for battery replacement
Before starting the battery replacement process, it’s essential to power off your Roomba and prepare it for the procedure.
Follow these steps:
- Turn off the Roomba: Ensure your Roomba is switched off by pressing the “Clean” or “Power” button located on the device. This will prevent any accidental activation during the battery replacement.
- Disconnect from the charging dock: If your Roomba is currently docked for charging, unplug it from the charging dock to ensure there is no power supply to the device. This step is crucial for safety purposes.
- Remove the dustbin: Open the dustbin compartment by pressing the release button and pulling the dustbin out. Set it aside in a safe place for now.
Removing the old battery safely and properly
Now that your Roomba is prepared, you can proceed with removing the old battery. Follow these steps:
- Locate the battery compartment: Flip your Roomba over to access the underside. Look for the battery compartment, which is usually located towards the back or center of the device.
- Remove the screws: Using the appropriate screwdriver, carefully remove the screws securing the battery compartment. Place the screws in a secure location to avoid misplacing them.
- Open the battery compartment: After removing the screws, gently lift the cover of the battery compartment. Take note of any clips or latches that may be holding it in place. Carefully release them if necessary to fully open the compartment.
- Disconnect the old battery: Inside the battery compartment, you’ll find the old battery connected to a wire harness or connector. Firmly grasp the connector and gently disconnect it from the Roomba’s circuit board. Be careful not to pull on the wires directly, as this can cause damage.
- Remove the old battery: Once the battery is disconnected, carefully lift it out of the battery compartment, ensuring you have a firm grip on it. Set the old battery aside for proper disposal or recycling, as it contains hazardous materials.
Inserting the new battery and ensuring a secure fit
With the old battery removed, it’s time to insert the new battery. Follow these steps for a secure fit:
- Prepare the new battery: Take the new replacement battery out of its packaging. Ensure it is fully charged according to the manufacturer’s instructions. It’s a good idea to inspect the battery for any signs of damage before proceeding.
- Align the new battery: Hold the new battery with care and align it correctly in the battery compartment. Make sure the positive (+) and negative (-) terminals on the battery match the corresponding terminals in the compartment.
- Connect the new battery: Take the wire harness or connector from the Roomba and securely plug it into the new battery. Ensure the connection is firm and properly seated. Avoid applying excessive force that could damage the connector or wires.
- Close the battery compartment: Carefully position the battery compartment cover back into place. Align it correctly with the Roomba’s body and ensure any clips or latches engage properly. Press down gently to secure the cover.
- Reattach the screws: Using the screwdriver, reinsert and tighten the screws to secure the battery compartment cover. Make sure they are tightened firmly but avoid overtightening, as it can damage the screws or the device.
Testing Roomba’s new battery and verifying its functionality
After successfully replacing the battery, it’s essential to test its functionality. Follow these steps to ensure everything is in working order:
- Reattach the dustbin: Take the dustbin you set aside earlier and slide it back into its compartment until it clicks into place. Ensure it is properly seated to allow for uninterrupted operation.
- Power on the Roomba: Press the “Clean” or “Power” button to turn on your Roomba. If the battery replacement was successful, the Roomba should power on without any issues.
- Observe the charging process: Place your Roomba on the charging dock and observe if it starts charging. The battery indicator lights should show that the new battery is being charged. If the lights do not come on or indicate a charging status, double-check the battery connection and make sure it is securely attached.
- Test the runtime: Allow the Roomba to charge fully, following the manufacturer’s recommended charging time. Once charged, initiate a cleaning cycle and observe the runtime. The new battery should provide an improved runtime compared to the old one, allowing for more efficient cleaning.
Troubleshooting common issues during the replacement process
While replacing the battery, you may encounter some common issues. Here are a few troubleshooting tips:
- Loose connections: If the Roomba does not power on or charge after the battery replacement, double-check the connections. Ensure the wire harness or connector is firmly plugged into both the battery and the Roomba’s circuit board.
- Misalignment of the battery: If you face difficulty closing the battery compartment cover, the new battery may not be aligned correctly. Double-check the alignment of the battery and ensure it fits snugly in the compartment.
- Charging issues: If the Roomba does not charge or the battery indicator lights do not show a charging status, confirm that the charging dock is connected to a power source. Also, check for any debris or obstructions on the charging contacts of both the Roomba and the docking station.
- Unresponsive Roomba: In rare cases, the Roomba may become unresponsive after battery replacement. Try performing a soft reset by holding down the “Clean” or “Power” button for 10-15 seconds until the Roomba restarts. This can often resolve any temporary issues.
By following these step-by-step instructions and troubleshooting tips, you can successfully replace the battery in your iRobot Roomba and restore its optimal performance.
Now that you have completed the battery replacement process, your Roomba is ready to resume its cleaning duties and keep your home looking pristine.
Extending the Battery Life of Your Roomba
Tips and best practices to maximize battery performance
To extend the battery life of your iRobot Roomba and optimize its performance, consider implementing the following tips and best practices:
- Set a cleaning schedule: Program your Roomba to clean at specific times when needed rather than running it constantly. This helps conserve battery power and allows for efficient cleaning.
- Clear the floor of obstacles: Remove any potential obstacles, such as loose wires or small objects, from the floor before initiating a cleaning cycle. This reduces the strain on the Roomba’s motor and battery.
- Optimize room layout: Rearrange furniture and objects in a way that allows the Roomba to navigate freely without getting stuck or encountering unnecessary obstacles. This helps minimize the battery drain caused by frequent repositioning attempts.
Proper charging habits and maintenance
Proper charging habits and maintenance are essential for maximizing the battery life of your Roomba:
- Regularly charge your Roomba: Follow a consistent charging routine by ensuring your Roomba is placed on the charging dock when not in use. This maintains the battery’s optimal charge level and helps prevent deep discharges.
- Avoid overcharging: Once the Roomba is fully charged, remove it from the docking station. Overcharging can potentially degrade the battery’s performance over time.
- Store the Roomba properly: If you plan to store your Roomba for an extended period, make sure to charge it to 60-80% before storing it in a cool, dry place. This helps preserve the battery life and prevents it from draining completely.
Cleaning the Roomba and its components regularly
Regular cleaning of your Roomba and its components not only ensures efficient performance but also contributes to extending the battery life:
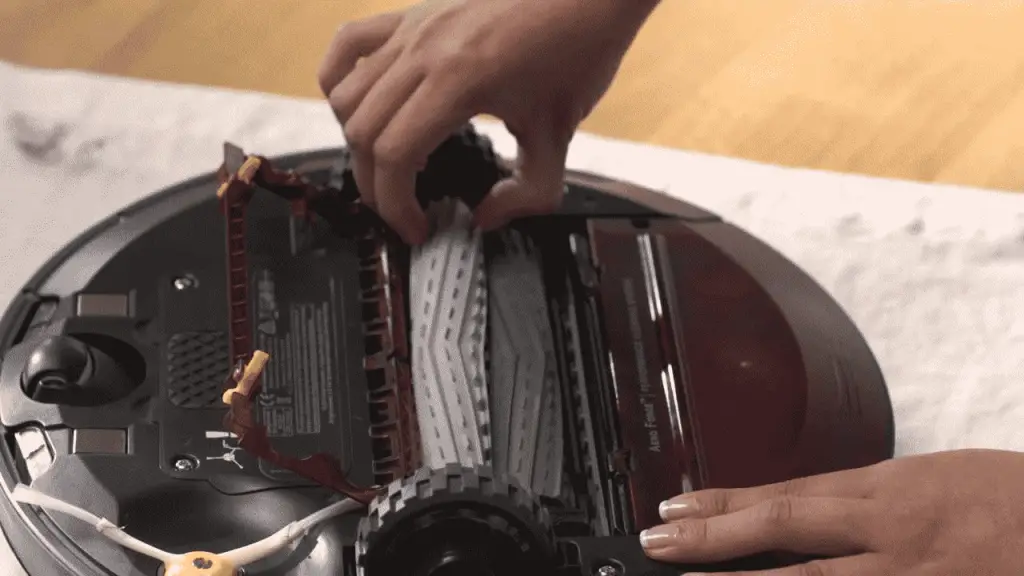
- Clean the brushes and filters: Regularly remove tangled hair, debris, and dust from the brushes and filters. Clogged brushes and filters can strain the motor, leading to increased battery usage.
- Clear the wheels and sensors: Check and clean the wheels and sensors of your Roomba to prevent any obstruction or buildup that can impede its movement. This helps reduce unnecessary battery consumption.
- Keep the charging contacts clean: Periodically inspect and clean the charging contacts on both the Roomba and the docking station. Dust or debris on these contacts can affect the charging process and lead to inefficient battery charging.
By implementing these practices, you can extend the battery life of your iRobot Roomba and ensure its long-term performance and reliability.
A well-maintained battery allows your Roomba to operate at its best, delivering optimal cleaning results and prolonging the lifespan of your device.
Recycling and Disposing of Old Batteries
Environmental impact and importance of responsible disposal
Proper disposal of old batteries, including those used in your iRobot Roomba, is crucial for minimizing environmental impact.
Batteries contain hazardous substances such as lead, cadmium, and mercury, which can seep into the soil and water if not disposed of correctly. These substances pose a significant threat to human health and ecosystems. Therefore, it is essential to prioritize responsible battery disposal to protect the environment.
Available options for recycling used Roomba batteries
When it comes to recycling used Roomba batteries, there are several options available:
- Manufacturer recycling programs: iRobot, the manufacturer of Roomba, may offer battery recycling programs. Email them or contact their customer support to inquire about any available programs for recycling Roomba batteries.
- Local recycling centers: Many recycling centers accept batteries for proper recycling. Research and locate recycling centers in your area that accept household batteries. They often have designated drop-off points or collection bins specifically for batteries.
- Retailer programs: Some electronics retailers or home improvement stores have battery recycling programs. They provide designated collection points where you can drop off old batteries for recycling.
- Call2Recycle: Call2Recycle is a non-profit organization that offers battery recycling programs in many countries. Visit their website to find drop-off locations near you or inquire about mail-in recycling options.
Local regulations and resources for proper disposal
It’s important to be aware of local regulations and resources regarding battery disposal. Here are a few steps you can take:
- Research local regulations: Check your local government or municipality’s website for specific guidelines and regulations regarding battery disposal. They may provide information on proper disposal methods, collection events, or recycling initiatives in your area.
- Contact waste management authorities: Reach out to your local waste management authorities or environmental agencies for information on battery recycling programs or designated drop-off locations. They can provide guidance on responsible disposal methods.
Remember, responsible disposal of old batteries is essential to protect the environment and prevent harm to human health. By recycling your used Roomba batteries, you contribute to the reduction of hazardous waste and promote sustainable practices.
Frequently Asked Questions
Here are answers to some common questions regarding Roomba battery replacement:
How often should I replace the battery in my Roomba?
The lifespan of a Roomba battery varies depending on usage and maintenance. On average, it is recommended to replace the battery every 1 to 2 years for optimal performance.
Can I use a third-party battery replacement for my Roomba?
Yes, you can use a third-party battery replacement as long as it is compatible with your Roomba model. Ensure that the voltage, capacity, and physical dimensions match the specifications of your Roomba’s original battery.
Will replacing the battery void my Roomba’s warranty?
No, replacing the battery does not void the Roomba’s warranty. However, it’s important to ensure that the replacement process is done correctly, as any damage caused during the procedure may not be covered under warranty.
My Roomba doesn’t hold a charge for long. What should I do?
Try resetting the battery by fully draining it and then charging it for a full cycle. If the issue persists, it may indicate a battery nearing the end of its lifespan. Consider replacing the battery with a new one.
The Roomba battery drains quickly even after replacement. Why?
Ensure that you are using a compatible and high-quality replacement battery. If the issue persists, there may be other factors affecting battery life, such as excessive dirt or debris obstructing the Roomba’s movement or a faulty charging dock. Clean the Roomba thoroughly and ensure the charging dock is functioning properly.
Can I overcharge my Roomba battery?
No, Roomba batteries are designed with built-in safety features to prevent overcharging. Once the battery is fully charged, the charging process stops automatically.
Troubleshooting tips and additional resources

Here are a few troubleshooting tips and additional resources for Roomba battery-related issues:
- Soft reset: If you experience any issues with your Roomba after battery replacement, try performing a soft reset by holding down the “Clean” or “Power” button for 10-15 seconds until the Roomba restarts.
- Manufacturer support: If you encounter persistent issues, reach out to the iRobot customer support for personalized assistance and troubleshooting guidance.
- Online communities and forums: Join online communities and forums dedicated to Roomba users. They are great resources for troubleshooting tips, sharing experiences, and seeking advice from fellow Roomba owners.
- User manuals and guides: Refer to the user manual or online guides provided by iRobot for detailed instructions on battery replacement and troubleshooting specific to your Roomba model.
Remember, if you’re unsure about any aspect of battery replacement or encounter persistent issues, it’s always recommended to seek assistance from the manufacturer or authorized service providers.
Conclusion
In this article, we explored the process of replacing the battery in your iRobot Roomba. We discussed the different types of batteries used, battery specifications, and signs of a failing battery.
We provided a step-by-step guide for the battery replacement process, along with troubleshooting tips. Additionally, we highlighted the significance of responsible battery disposal and shared tips to extend the battery life of your Roomba.
Proper battery maintenance and timely replacement are essential for ensuring optimal performance and longevity of your Roomba. By following the recommended guidelines, you can maximize the battery’s lifespan, improve cleaning efficiency, and prevent common battery-related issues.
Now that you have the knowledge and instructions to replace your Roomba’s battery, it’s time to take action.
Enjoy the enhanced performance, extended runtime, and efficient cleaning that a new battery brings to your Roomba. Remember to follow proper maintenance practices and dispose of old batteries responsibly to contribute to a healthier environment.
Happy cleaning with your newly rejuvenated iRobot Roomba!