For website owners who utilize Cloudflare as their DNS provider, Google Search Console offers a convenient and default method of domain verification using TXT records.
This approach allows webmasters to prove their ownership of the domain and gain access to valuable SEO tools and insights within Google Search Console. By adding the specified TXT record to their Cloudflare DNS settings, website owners can verify their domain with Google Search Console seamlessly.
However, it is essential to address a potential issue that may arise during this process.
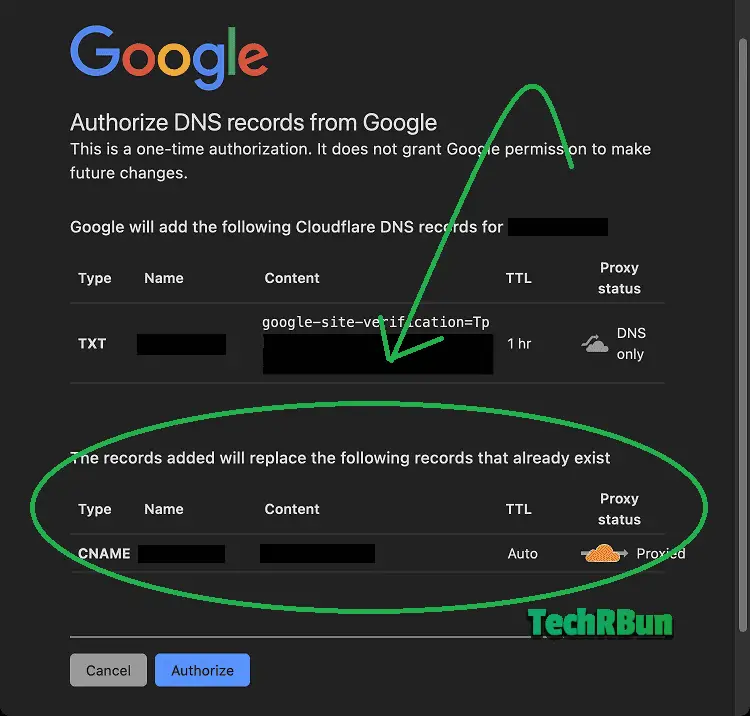
Cloudflare has a peculiar behavior where it automatically removes the CNAME record at the root when adding Google’s site verification TXT record. This unexpected behavior can result in the website going down and become unavailable unless the CNAME record is restored manually.
This bug has caused significant concerns among website owners who rely on Cloudflare for DNS management, as it affects their site’s accessibility and, consequently, their SEO performance.
The purpose of this article is to not only shed light on this bug, but also provide a step-by-step guide on how to get your domain verified on Google Search Console by adding that TXT record in Cloudflare in a safe and proper way, such that all of your core DNS records remain unchanged.
We’ll also guide the ones who have already lost their CNAME records and got their sites down, to restore their CNAME records and get their sites up and running.
When a site goes down due to the removal of the CNAME record, it becomes inaccessible to both users and search engine bots. This downtime directly impacts the site’s search engine rankings, leading to a potential loss in organic traffic, diminished visibility, and decreased revenue.
To address this issue and minimize the impact on SEO, it is crucial to explore potential solutions and workarounds.
In the subsequent sections of this article, we will discuss the steps website owners can take to bypass the bug’s effects and ensure uninterrupted Google Search Console domain verification via Cloudflare.
Table of Contents
Steps To Add GSC Verification TXT Records To Cloudflare Properly
In this section, we will guide you through the step-by-step process of manually adding a TXT record in Cloudflare DNS, highlighting the advantages and SEO benefits of taking this approach, as well as addressing potential challenges or considerations.
Step 1: Accessing Cloudflare DNS Settings
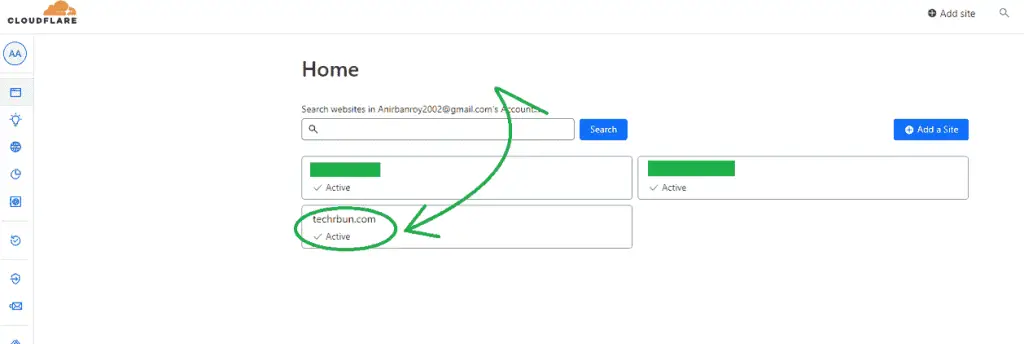
To begin, log in to your Cloudflare account and navigate to the dashboard of the specific website you want to verify.
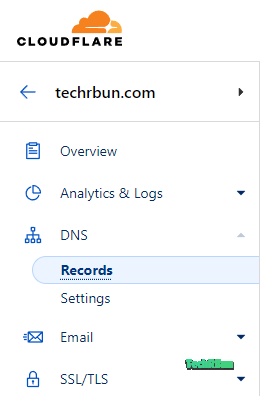
From the dashboard, locate the “DNS” tab, which will provide you with access to the DNS settings for your domain.
Step 2: Identifying the TXT Record
Next, identify the TXT record that Google has provided for the purpose of verification of your domain. This TXT record is usually a unique string of characters or a code snippet that needs to be added to your DNS configuration.
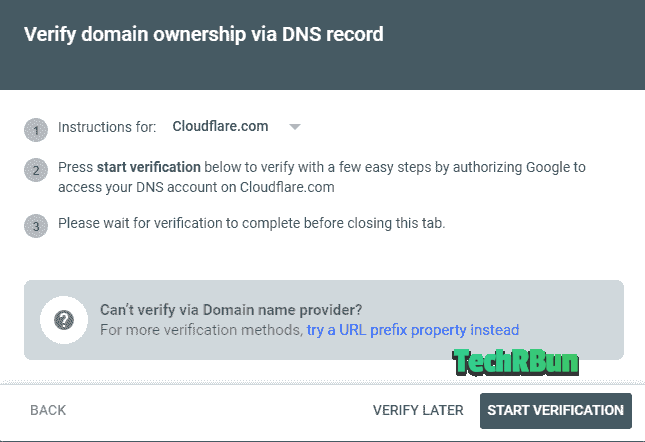
The first step to obtain this code is to change the “Instructions for:” selection to “Any DNS provider”, as shown below.
The TXT record should be visible at number 4, as shown in the screenshot below.

Step 3: Adding the TXT Record
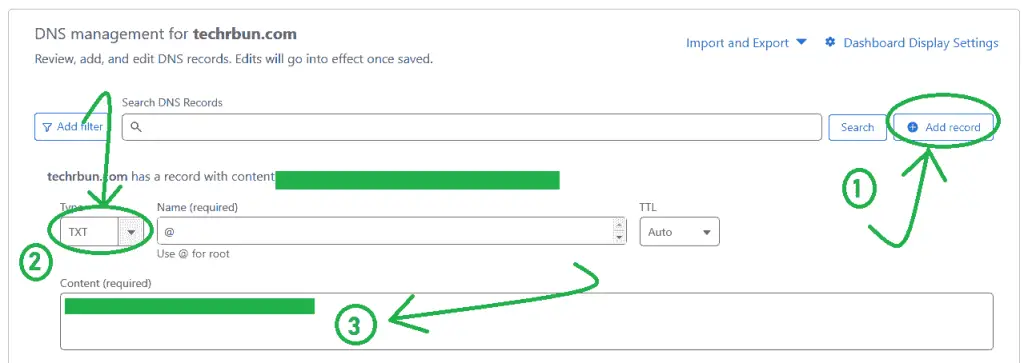
Within the Cloudflare DNS settings, click on the “Add Record” button to create a new record. Select “TXT” from the dropdown menu to specify the record type.
Then, paste the TXT record provided by Google Search Console, inside the Content field. Ensure that there are no additional spaces or formatting errors.
Ensure that the Name is set to ‘@’ and TTL is Auto.
Step 4: Saving the Changes
Once you have filled in the required information, click on the “Save” button to add the TXT record to your Cloudflare DNS configuration.
Cloudflare will then propagate the changes across their global network, which may take a few moments to complete.
Step 5: Check DNS Propagation For The TXT Record
You can check the propagation status of the newly added Google Search Console DNS verification TXT record using the whatsmydns tool’s TXT record propagation checker.
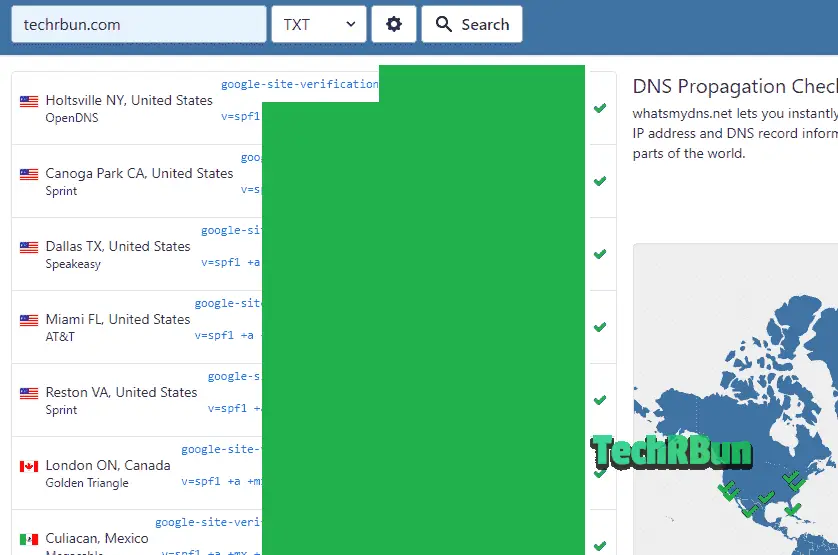
In most cases it should only take 5-10 mins for the newly added Google Search Console DNS verification TXT record to propagate globally. However, in rare cases, it might take up to 48 hours.
Step 6: Click On Verify
Now go back to the Google Search Console tab, and hit VERIFY. That’s all!
Challenges and Considerations
While the manual approach provides significant advantages, it is important to consider potential challenges and additional factors when adding a TXT record manually in Cloudflare DNS.
One key aspect is ensuring accuracy during the record creation process. Even a minor error in the TXT record content or formatting can hinder the verification process. Hence, it is crucial to double-check the accuracy of the provided TXT record and carefully input the information into Cloudflare DNS.
Additionally, it’s essential to be mindful of the TTL (Time-to-Live) settings when adding a TXT record manually. The TTL determines how long the record will be cached by DNS resolvers. It is recommended to set a reasonable TTL value to balance responsiveness and potential changes you might make in the future.
Lastly, periodic monitoring of the TXT record’s presence and functionality is essential. Regularly check Google Search Console to ensure that the verification is ongoing and that your site’s SEO data continues to be accurately tracked.
By following these steps and considering the challenges, you can successfully integrate the TXT record manually within Cloudflare DNS, regain control over domain verification, and safely track your website’s SEO performance.
How To Restore CNAME Records For Those Who Have Already Lost It
If you have already fallen victim to the issue of Cloudflare automatically removing the CNAME record at the root when adding Google’s site verification TXT record, there are steps you can take to restore the CNAME record and ensure the proper functioning of your website.
In this section, we will guide you through the process of restoring your lost CNAME record, and get your website back up!
To begin, it is crucial to verify that the CNAME record has indeed been removed. You can do this by accessing your Cloudflare DNS settings and reviewing the current records associated with your domain. Look for the CNAME record that was previously in place and check if it is missing or has been replaced.
If you find that the CNAME record is absent, the following steps will help you restore it:
Step 1: Back Up Your DNS Configuration
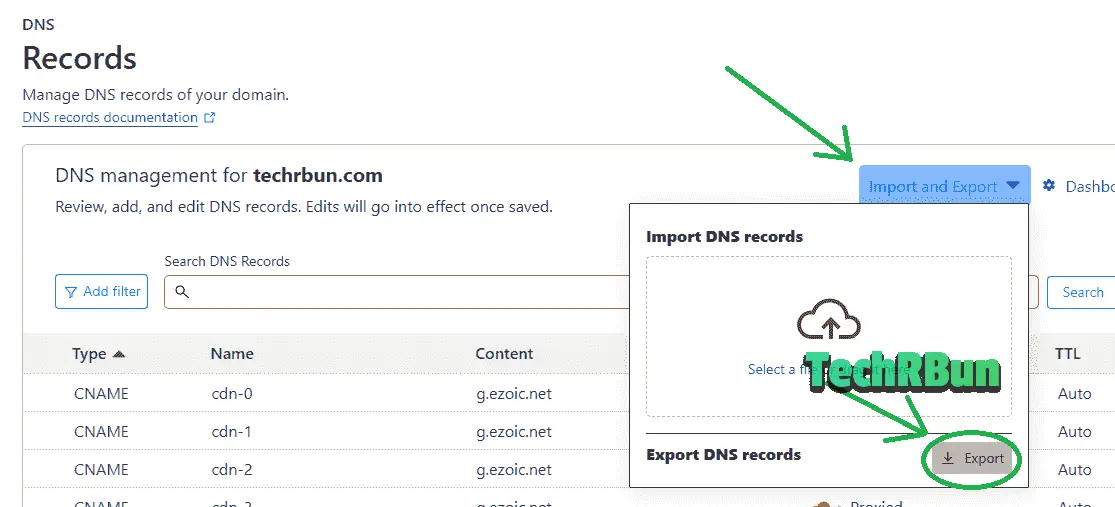
As a precautionary measure, it is advisable to back up your DNS configuration before making any changes. This allows you to revert to the previous settings if needed. Most DNS providers, including Cloudflare, offer options to export or download a backup of your DNS configuration.
Step 2: Contact Your Hosting Company
To ensure that you accurately recreate the missing CNAME record, it is recommended to reach out to your hosting company or DNS provider for assistance. Their support teams have the expertise to guide you through the process and provide you with the necessary information to recreate the CNAME record correctly. They can help you avoid any potential misconfigurations and ensure a smooth restoration process.
Step 3: Recreate the CNAME Record
With the guidance of your hosting company or DNS provider, navigate to your Cloudflare DNS settings and add a new CNAME record.
Input the appropriate subdomain and the target domain or hostname to which it should point. Make sure to enter the details accurately to ensure the proper functioning of your website.
Step 4: Verify CNAME Record Propagation
After recreating the CNAME record, it will need to propagate across Cloudflare’s global network. This propagation process can take some time, typically ranging from a couple of hours up to 48 hours.
It is advisable to periodically check the status of the CNAME record to ensure its successful restoration.
If you encounter any issues or face difficulties during the restoration process, it is recommended to seek assistance from your hosting company’s support team.
By following these steps and utilizing the support available from your hosting company, you can successfully restore the CNAME record that was inadvertently removed during the domain verification process. Restoring the CNAME record ensures the proper functioning of your website, keeps the domain still verified with Google Search Console, and safeguards your SEO efforts.
Alternative Ways of Domain Verification On Google Search Console
Although there are alternative methods available for prefixed domain verification (with http/https protocol and subdomain), such as using a meta tag or uploading a file to the root directory of your website, it’s important to understand their limitations.
These methods are primarily subdomain and protocol specific, that is, http://www.site.com and https://www.site.com will be treated as two separate entities, same for www.site.com and just site.com.
They do not support verification for the entire domain.
In contrast, the domain verification method discussed in this article remains the most effective and comprehensive approach, particularly for Cloudflare customers.
When opting for the meta tag or file upload method, website owners often need to create separate properties and verify them individually for each subdomain. This process can be time-consuming, especially for websites with numerous subdomains.
Managing multiple properties and verification processes can lead to complexity and potential oversight, making it a less efficient option for comprehensive domain verification.
On the other hand, domain verification through TXT records in Cloudflare DNS offers a centralized and streamlined approach. By verifying the domain itself, website owners gain access to SEO tools and insights that encompass the entire domain, including all its subdomains.
This unified view provides a holistic understanding of the website’s performance and allows for comprehensive optimization efforts.
For Cloudflare customers, leveraging the domain verification method discussed in this article becomes even more advantageous. Cloudflare’s DNS management services, combined with the integration of Google Search Console, offer a seamless and integrated experience. It eliminates the need for managing separate properties for each subdomain and provides a consolidated view of the website’s SEO metrics and performance.
By choosing the domain verification method within Cloudflare, website owners can simplify their verification process, avoid subdomain-specific complexities, and efficiently manage their SEO efforts across the entire domain. This approach ensures that all subdomains are included in the SEO analysis, tracking, and optimization process.
Furthermore, by utilizing domain verification in Cloudflare, website owners can benefit from the platform’s robust security features and performance optimizations. Cloudflare’s extensive network infrastructure and content delivery network (CDN) enhance website speed, reliability, and protection against DDoS attacks. These advantages contribute to improved user experience and can positively impact search engine rankings.
In conclusion, while alternative methods like meta tags or file uploads have their uses in specific scenarios, the domain verification method remains the recommended and superior option, particularly for Cloudflare customers. By implementing this method, website owners can optimize their SEO strategies holistically, save time and effort in managing separate properties, and gain valuable insights into their website’s overall performance.
I hope you found this article helpful, and were able to smoothly get your domain verified with Google Search Console by adding TXT DNS record to your Cloudflare dashboard.
If you have any queries, feel free to comment down below, and I’ll try my best to help you out!